Homeowners often ask us how to secure their fittings to their Hebel walls – items such as light fittings, taps, downpipes, clotheslines, hot water services and hose reels. Using the right fitting for the relevant fixture is important to help avoid damaging the wall.
It’s important to seek advice on your individual home from your builder or designer before drilling holes or securing any loads onto Hebel walls.
Fixing to Hebel Guide
Our Fixing to Hebel Guide has detailed information on how to install a hose reel and a clothes line.

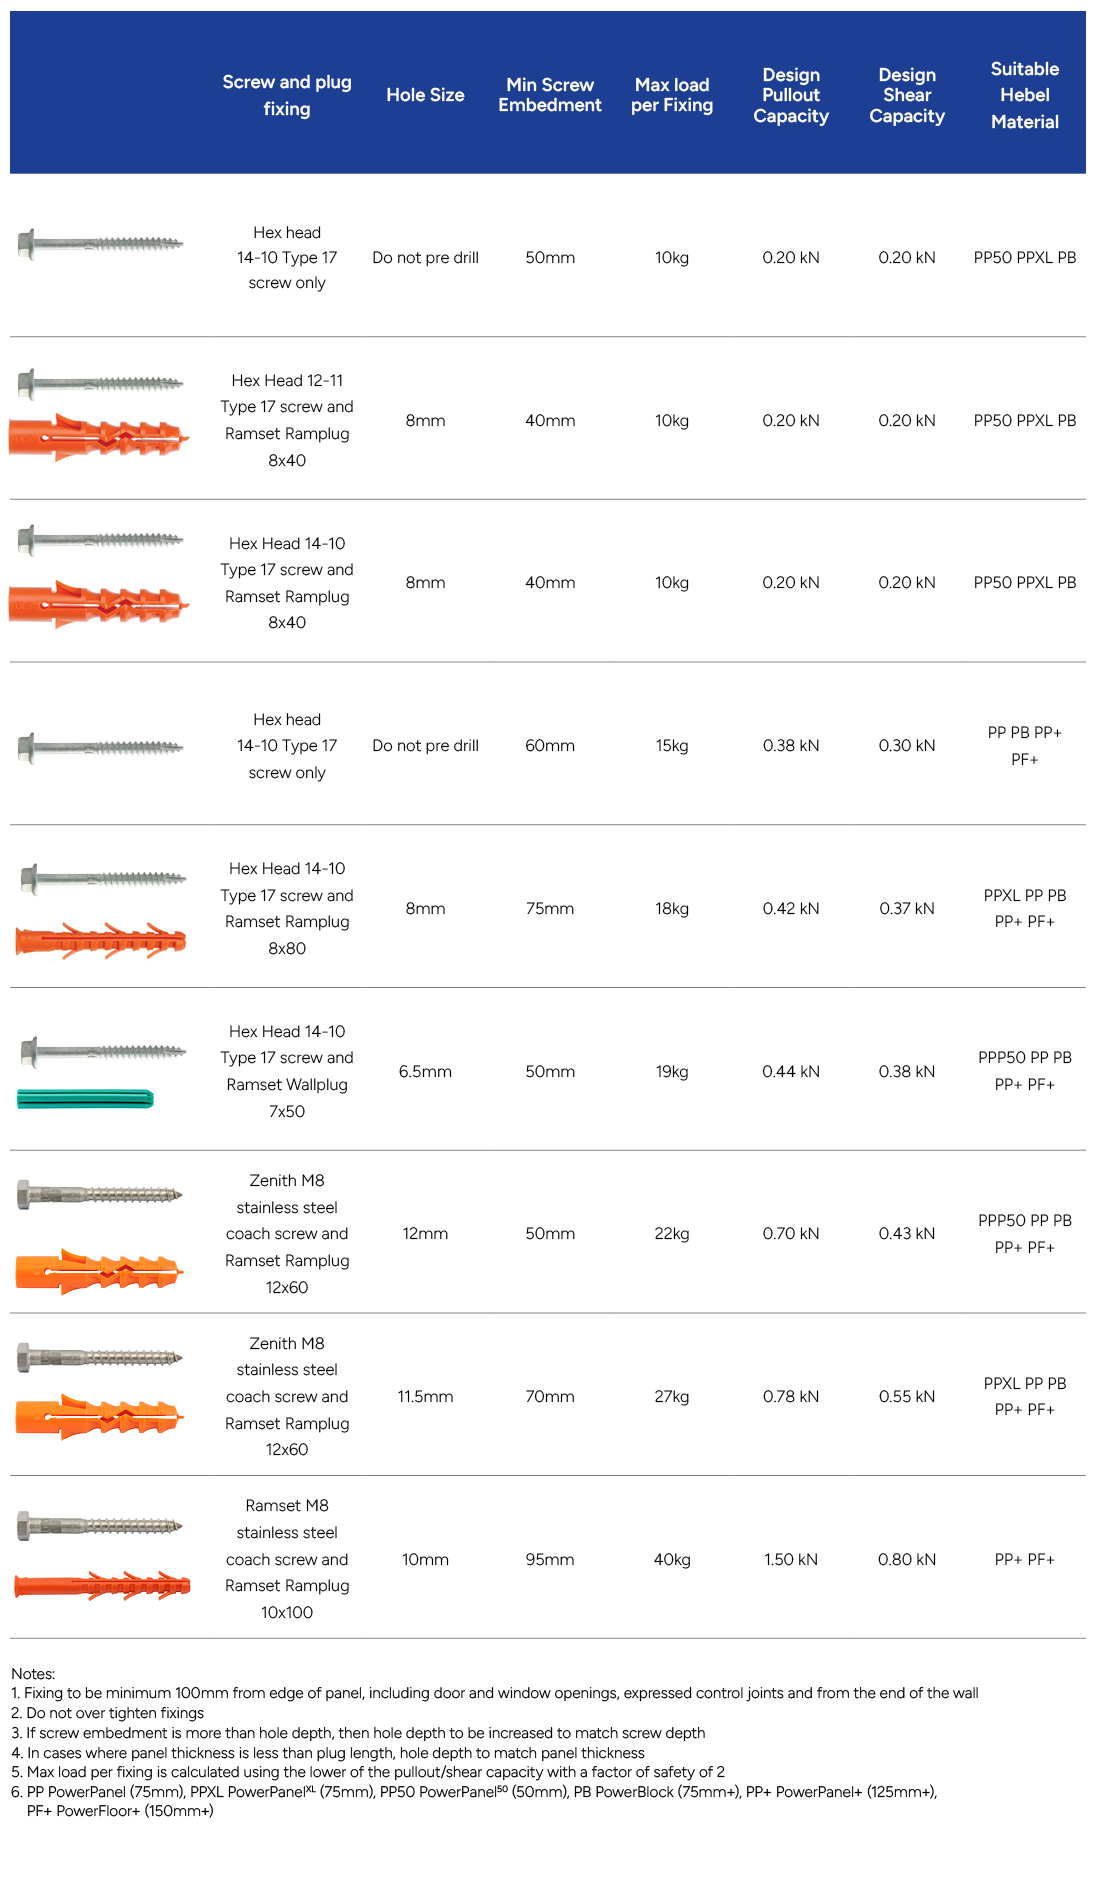
Common Fixings to Hebel
This table outlines what common fixings you will need to use when securing your fittings to a Hebel wall.
Drilling into Hebel walls
Holes can be drilled into Hebel walls using a masonry drill bit fitted to a standard (not rotary hammer) drill. Once the penetration has been filled with the required cables or the like, the gap around the penetration should be filled with a reputable flexible sealant such as Sikaflex polyurethane sealant.
Fixing heavy and/or vibrating loads
Homeowners should be aware that items such as gates, decks, pergolas, carports and basketball hoops can cause vibrations or excessive loads on Hebel walls – and they shouldn’t be secured to the walls. There is a solution; fixing them to posts that are independent of the wall will ensure the load isn’t directly transferred to the Hebel panels or blocks.
These fixings are available through selected hardware outlets and building suppliers around Australia.
Our friendly CSR Hebel team is happy to provide assistance to homeowners in doubt.
Contact us on 1300 443 235 or email [email protected].