


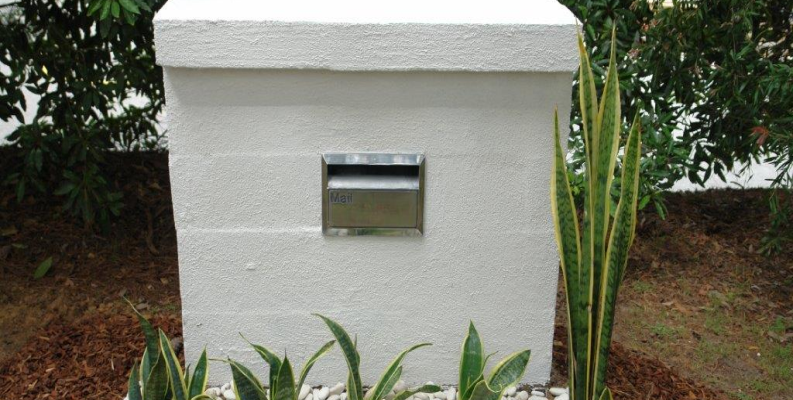
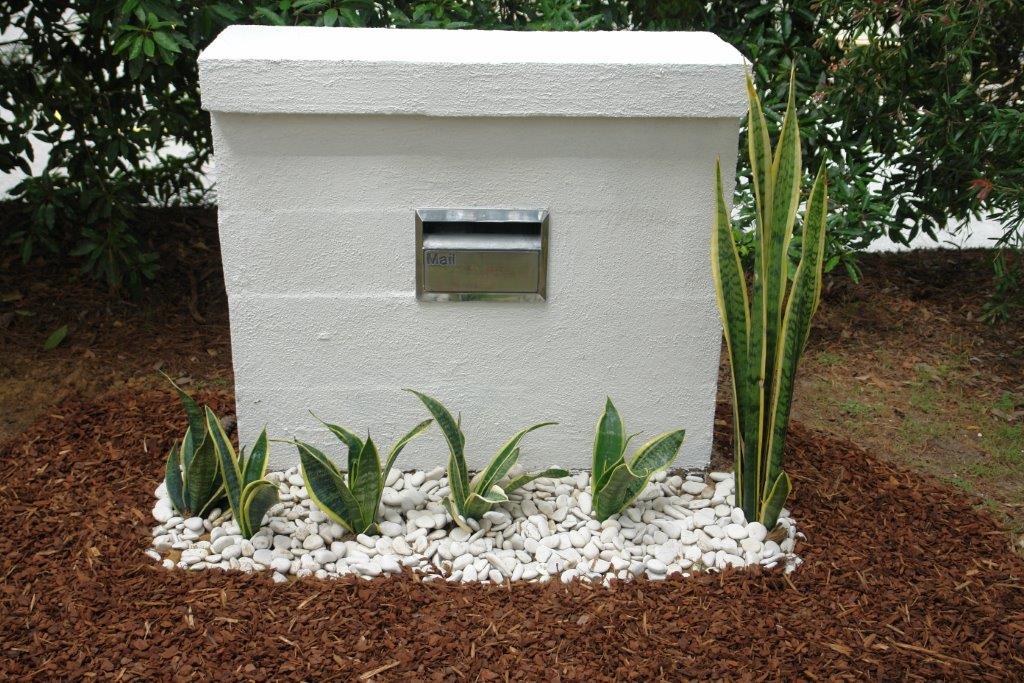
This project is easily constructed in a few hours and is built on an existing or purpose laid concrete footing that has a minimum surface area of 1000mm x 300mm.
Size – 900mm long x 230mm deep, as high as you want.
Step by step guide
1 – Footing
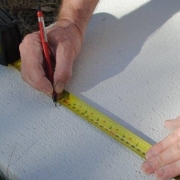 Fig. 1.1
Mark out an area 900mm long x 230mm wide on the concrete footing, making sure the marked dimensions are straight and square. This will be the external dimensions of your letterbox.
2 – First Course
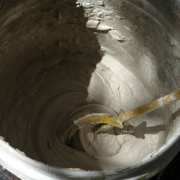 Fig. 2.1
The 900mm long walls are made from a standard 600m block, and a 300mm section of block, which is made by cutting a standard block in half.
The blocks will have a 30mm gap between the front and rear skin of block-work.
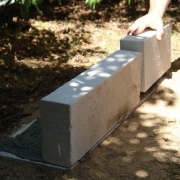 Fig. 2.2
Lay a bed of Hebel Mortar on the footing to assist in getting the first course of blocks straight and level before laying the first course for the front wall.
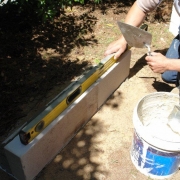 Fig. 2.3
Use the back of the trowel to gently tap the blocks into the Hebel Mortar bed checking with a spirit level that they are level and plumb as you do so.
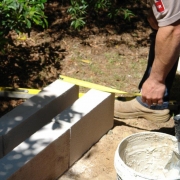 Fig. 2.4
Use Hebel Adhesive between all vertical joins on the first course of blocks.
3 – Second Course
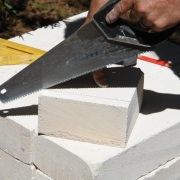 Fig. 3.1
Take a block and cut 6 x 30mm slices from one end with a handsaw.
 Fig. 3.2
Position one of these ‘slices’ flush with the end of the blocks as the spacer between the front and back rows of blocks before laying the first course of the rear wall (use the other slices to finish the higher rows).
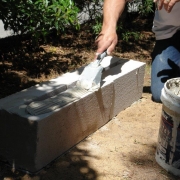 Fig. 3.3
Apply Hebel Adhesive to the top of the first course and lay the second course in a stretcher bond pattern ensuring Hebel Adhesive is also applied to the vertical ends of each block, check level of this, and all subsequent courses, as you go.
The minimum overlap of vertical joins for the stretcher bond layout is 100mm.
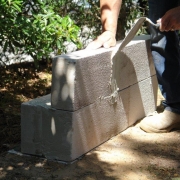 Fig. 3.4
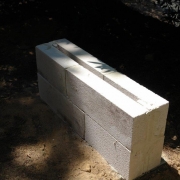 Fig. 3.5
4 – Letterbox Installation
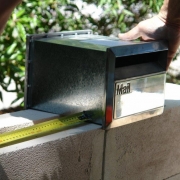 Fig. 4.1
Position the built-in letterbox on top of the second course of blocks and check it will be installed at the ideal height .
You may have to cut an infill piece of Hebel below the letterbox if it’s less than 200mm high.
Place the letterbox unit in the desired position (at least 200mm from either end).
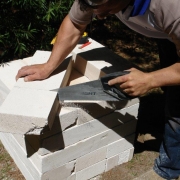 Fig. 4.2
Cut 2 blocks to the width of the wall, and place these blocks at each end of the 3rd course as shown.
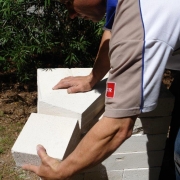 Fig. 4.3
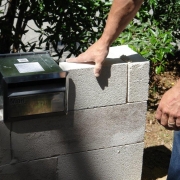 Fig. 4.4
Fill the remaining 3rd course by cutting blocks to the required size to suit the gap either side of the letterbox.
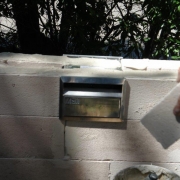 Fig. 4.5
Use Hebel Adhesive on all block joins.
5 – Letterbox Top
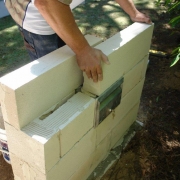 Fig. 5.1
Apply Hebel Adhesive along the top of the third course and lay blocks for the fourth course, again, staggering the vertical joins between blocks to the course below.
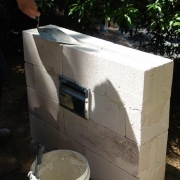 Fig. 5.2
The fifth course is to “cap” the wall and cover the cavity between the front and rear walls.
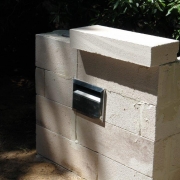 Fig. 5.3
The capping blocks are laid flat and can overhang the front and rear of the wall for a great feature.
To achieve a square monolithic look, the blocks on the top course can be cut and laid flush with the wall (without overhanging).
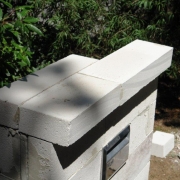 Fig. 5.4
To achieve a ledged capped look, the blocks can laid flat to overhang the main wall.
 Fig. 5.5
Ensure only 25% of any block width is overhanging with the main 75% of the block fully glued to the wall below. (max overhang is 50mm)
6 – Finishing
Scrape all excess Hebel Adhesive from joints between blocks before the adhesive fully hardens.
When fully dry, sand the Hebel block surface to a smooth flat surface.
If desired you can decoratively shape and contour the Hebel using an old wood rasp.
7 – Coating
 Fig. 7.1
Basecoat
Hebel HighBuild is specially formulated for the Hebel substrate (standard cement renders are not recommended).
HighBuild provides a base levelling and preparation coat for subsequent acrylic texture coating systems.
Apply with a render trowel over the smooth and clean Hebel block work – levelling the HighBuild to a smooth flat surface.
Texture finish options
Use a premium flexible exterior acrylic texture coat system, providing ultimate weather resistance.
These coatings can be trowelled for a monolithic finish.
Alternatively they can be applied with a glove for ‘bagged’ look – or a roller for a finer texture finish.
- 1 x letterbox insert 230mm deep
- 16 x 100mm Hebel Blocks
- 1 x 20kg bag of Hebel Adhesive
- 1 x 20kg bag of Hebel HighBuild Render
- Mixing bucket
- 75mm notched trowel to apply Hebel Adhesive
- rubber mallet
- disposable wood handsaw or tungsten carbide AAC handsaw
- stirrer for electric drill
- trowel for render (unless a sponged finish is required)
- mortar trowel
- measuring tools
Safety information
Your health and safety is the number one priority. It’s important to understand how to work safely with Hebel to minimise your risk, and prepare ahead when handling, cutting, sawing, abrading, chasing or crushing Hebel panels and blocks. Please refer to the Working Safely with Hebel page for a guide on best safety practices.
What else can I build with Hebel?
View all


Find a...
We have a network of suppliers ready to help you get your project up and running.